1. Prep: Use a light moisturizer or primer around the whole eye area. Then do the foundation/concealer thing.
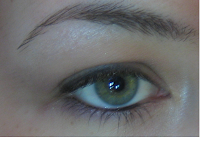
2. Next, fill in the brows (Bobbi Brown says this is the most important step everybody skips!) and highlight the inner corner of the the eye and the brow bone. For this step I use the revlon brow enhancer. I love this product. I also use it to highlight my cheek bones and the middle of my cupid's bow. Sorry, this one's kind of a crap picture.
3. Because this is a "natural" smokey eye, my next step is to apply eyeliner. Applying eyeshadow after softens the eyeliner. If you want a more dramatic look, apply eyeliner last. I have lined the whole upper lid and lined the inner rim of my lower lid (I learned this week that that's called water-lining). I used an angled eyeliner brush and the eyeliner is stila smudge-pot in black. For those of you who are new to water-lining, it is easier if you use a straight brush.
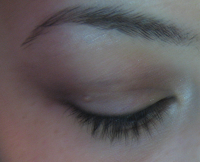
4. Next, is eyeshadow. I use two complimentary colors (Bare Escentuals wearable plum in light and dark), one lighter and one darker. I'm using plum because I have green eyes and purple brings out the green. For blue eyes, shades of brown work best. For brown or hazel eyes, the world is your oyster!! OK, so apply the lighter shade over the whole upper lid, meeting at the highlighted brow bone. I also sweep some under my bottom lash line, this looks good and also sets your eyeliner to keep it from smudging.
5. Now apply the darker shade along the crease of your eyelid and along the upper lash-line. The two should meet at the outer corner of your eye. I also use an angled eyeliner brush to sweep some of the darker color along the outer part of the lower lash line. Again, for a dramatic look you can be much more heavy-handed in this whole step.
6. Last is the lashes. Curl your upper lashes and apply mascara to both the upper and lower lashes. If you want to go over the top sexy, get some falsies. I won't go into how to apply them here, that's a whole other tutorial :)
Compare this to the first photo....whoa!


